How to Revive a Titanium Bowl: Step-By-Step
Share:
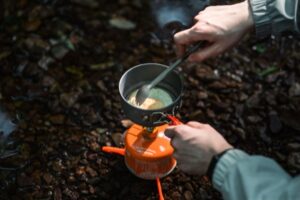
Why Titanium Bowl?
Titanium is a great material for bowls because it is strong, will not corrode and does not react with other elements. All of these characteristics make it ideal for casual and outdoor activities alike. This product is also good with titanium; it doesn’t have that metallic taste in your food, and it is resistant to temperatures. Unlike most other materials, this material does not add a metallic taste to your food and is very resistant to high temperatures. Due to these properties, it is often used by campers and hikers as well as anyone else who needs light-weight kitchenware that last for a long time in regular use.
So where does the revitalization of titanium bowls sometimes come in? Your titanium bowl can lose its luster and build stains over time from food residues, hard water, and normal wear and tear. There are many ways to maintain the appearance and functionality of the fountain, such as regular maintenance and occasional rejuvenation.
Indications That Your Titanium Bowl Requires Refreshment
Have you noticed that your titanium bowl is starting to look a bit lackluster or discolored? When you start to notice, it might be time for good hygiene and some relief. Here are some signs to look out for:
Staining: The clouded look changes into appearing like dark or stained spots on the bowl as time goes on.
Lifeless: If your bowl does not glisten and appears flat or old looking, it’s time for a face lift.
Buildup of residue: Residue from food or minerals can stick and leave a film or spots that typical washing will not remove.
Dealing with the problem early can save you from facing bigger worry in terms of cleaning.
Materials and Tools Needed
For a simple and effective revitalization, get the following materials and tools together before you begin.
- Mild soap
- Baking soda
- White vinegar
- Non-abrasive pad or cloth
- Soft-bristled brush (use less)
- Mag wheel cleaner, or other specialized titanium cleaner (optional)
- Soft towel for drying
What you want to be prepared for before cleaningWith all these items ready, it will make the process smoother and avoid cracking your bowl or clearing.
How to Keep a Titanium Bowl in Good Shape [Step-by-Step Tutorial]
1: Initial Cleaning
Start with a basic clean. Wash the surface with mild soap and warm water. Follow these steps:
- Rinse out the bowl: run warm water over the bowl (to rinse any large chunks of food).
- Soak with soap: Gently scrub the outside of the bowl with a mild dish soap and non-abrasive pad or cloth Areas where there is visible dirt or residue.
- Rinse it well: You do not want soapy liquids seeping into your food.
This first wash should rid the bowl of loose grime that is on the surface, this will make it easier for you to continue cleaning.
How to Get Rid of Tough Stains
Baking soda is also an abrasive yet gentle on tough stains. Here’s how to use it:
- Prepare paste: Combine baking soda and some water; then, you get a thick paste.
- Put the paste: Using a sponge, apply the paste on stained areas of your bowl.
- Rest: Sit the paste in place for 15 to 20 minutes. As this short and easy tip clears the slate up before asking other stains to join, it gives the baking soda time to kiss your dirty dishes.
- Scrub softly: Use a non-abrasive scrub pad or a soft-bristled brush to scrub the paste into the stains. With circular strokes will get better results.
- If necessary, wash bowl in warm water and repeat. Perform this again until the stains are gone.
Polishing the Bowl
To retain the sheen of the bowl, it is a must for you to polish;
- Select the cloth wisely: The right cloth comprises of a non-abrasive sponge or microfiber cloth.
- Polishing Method: Use the same technique with a gentle but constant circular motion over your entire bowl surface.
- Specialized cleaner (optional): If you want your titanium to shine even more, you can also use a polish made just for titanium. Always use according to the manufacturer´s guide for best results.
Not only does polishing make it look better, but also reduces slight scratches on the surface.
Ready for deep grime cleaning (optional)
A vinegar solution is more powerful and, therefore, in case of stubborn stains or deposits at the bottom of the bowl, it will provide a deeper clean.
- Prepare the solution: Combine white vinegar and water at a 1:1 ratio.
- Soak: soak the bowl in the solvent for half an hour. This works to dissolve any mineral build-up and stains.
- Give it a scrub: Rub the bowl with a non-abrasive pad or cloth after soaking. Use your lukewarm water to rinse it all out and make sure to get it thoroughly rinsed.
Final Rinse and Dry
Never rinse your bowl and give it a good drying. Make sure that you completely washed away the cleaning agents and you bowl is well dried out. Final Rinse Place the bowl under warm, running water to wash away any traces of the cleaning agents.
Dry: After washing you need to dry the bowl using soft towel or clean towel, make sure your bowl is completely dry because moistures can also create unnecessary bacteria in to your culture. This helps to stop the water spots & keep that bowl shiny.
Conclusion
It is easy to rehab a titanium pot. This way your titanium bowl will continue to look great and do its job well. Proper Cleaning and Maintenance Since this is a handmade wooden bowl, it must be preserved in terms of durability and looks by regular maintenance and proper cleaning. Have any tips of your own? Share them in the comments!!
ODM service
Looking for reliable wholesale outdoor gear supplier? At Deermaple, we specialize in ODM service, offering high-quality, innovative titanium cookware tailored to your needs.
If you are interested in titanium cookware wholesale, please contact us.
Disclaimer: This blog may contain user comments, opinions, and other user-generated content. We are not responsible for the accuracy, reliability, or opinions of user-generated content. User-generated content represents the opinions of the individual authors only and does not reflect the views of this website.
clarachen
Related Products
No products found.


