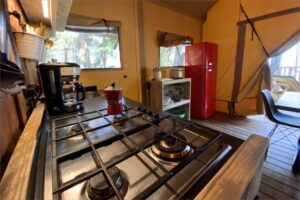
 Gas burners are a popular choice for cooking in many families. Because of their efficiency and precision in managing cooking temperatures. However, the burner heads of a gas stove might become dusty, clogged, or worn out over time, reducing their efficacy. To keep your gas stove in good working order, you must know how to remove and clean or replace the burner heads. This article will guide you through removing gas stove burner heads step by step.
Tools and Materials:
Before you start, gather the following tools and materials:
- Screwdriver (Phillips or flathead, depending on your stove’s design)
- Wrench or pliers
- Cleaning supplies (soapy water, a brush, and a cloth)
- Replacement burner heads (if needed)
- Safety equipment (gloves and safety glasses)
Step 1: Turn Off the Gas Supply
When working with gas appliances, safety should be the first priority. Before you begin, make sure the gas supply to the stove is switched off. Locate the gas shutdown valve, usually placed behind or beneath the stove. To turn off the gas, turn the valve handle clockwise.
Step 2: Allow the Stove to Cool
Allow the burner to cool completely before beginning any work. Because hot surfaces can cause burns, it is critical to allow the stove to cool for at least 30 minutes before using it.
Step 3: Remove the Grates and Burner Caps
Remove any grates or burner caps from the stove’s top. These may easily lift out of their appropriate locations or need to be gently eased out. Set them aside for subsequent cleaning.
Step 4: Locate and Remove the Burner Heads
The burner heads may be accessed once the grates and burner caps have been removed. Gas stoves often feature four or more burners, each with its own burner head. Under the burner caps are the burner heads.
To remove the burner heads:
- Lift the burner head gently to expose the gas supply line that links it to the stove. Typically, the gas supply line is a metal tube.
- Loosen the nut that connects the burner head to the gas supply line with a wrench or pliers. To loosen the nut, turn it counterclockwise.
- Carefully remove the burner head from the gas supply line once the nut has been sufficiently loosened. To avoid harming the gas line, go carefully and softly.
- Repeat this procedure for all burner heads that need to be removed.
Step 5: Clean the Burner Heads
With the burner heads removed, this is an ideal time to fully clean them. Burner heads can acquire oil, food particles, and other debris over time, reducing their performance. Here’s how to clean them:
- In a bucket or sink, prepare a soapy water solution.
- Soak the burner heads in the soapy water for a few minutes to loosen any tenacious dirt.
- Scrub any leftover debris from the burner heads using a brush or sponge.
- Thoroughly rinse the burner heads with clean water and allow them to dry thoroughly before reassembling.
Step 6: Reassemble the Burner Heads
When the burner heads are clean and dry, reconnect them to the gas supply lines. To reassemble the burner heads, follow these steps:
- Carefully reattach the burner heads to the gas supply lines.
- Using a wrench or pliers, tighten the bolts on the gas supply lines. Assemble them tightly, but avoid overtightening, which might harm the connections.
Step 7: Reinstall the Burner Caps and Grates
After properly reconnecting the burner heads, replace the burner caps and grates. Slide the burner caps onto the burner heads and into their respective positions. Replace the grates above the burners.
Step 8: Turn On the Gas Supply
Turn on the gas supply to the stove after confirming that all components are correctly reattached. Turn the handle counterclockwise to open the gas shut-off valve.
Step 9: Test the Burners
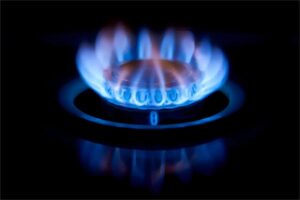
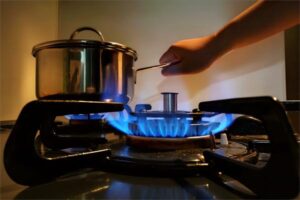
To confirm that everything is working correctly, light each burner and watch the flames. They should be uniform and blue. Uneven flames or yellow flames on any burner may indicate a problem with the burner head or gas supply that requires additional repair.
Step 10: Safety Check
Finally, perform a safety inspection to verify there are no gas leaks. Apply a dishwashing soap and water solution to the connections between the burner heads and the gas supply lines with a sponge or brush. The formation of bubbles indicates a gas leak. In such a circumstance, immediately switch off the gas supply and seek a professional to resolve the problem.
How To Clean Gas Burner Heads?
Cleaning the burner heads ensures that the gas flows freely and that the burners heat evenly.
- Wipe each burner head with a moist towel when they have cooled to the touch.
- Using the unique brush included in the burner head cleaning kit, remove food and dirt from between the burner head slots. You may also clean the interior of the burner head slots with a toothbrush. Use a paper clip or sewing needle to remove obstinate residue. A small-gauge wire can also be used.
- To remove spills and debris from the burner head, use the wire cleaning brush included in the kit.
- Clean the ignition port with the ignition port cleaning tool included in the box. A paper clip or tiny wire might also be used. Cleaning the ignition port ensures that the burner correctly ignites.
- After cleaning the slots and the ignition port, wipe the burner head with a moist towel.
Conclusion
Maintaining your gas stove by removing and cleaning the burner heads regularly is critical for its performance and safety. With the step-by-step instructions in this article, you can confidently complete this job and keep your gas stove running well. Always emphasize safety and seek guidance from professionals for any concerns or questions.