Hiking in the winter can be enjoyable and much less scary if you have the proper equipment, dress in layers of appropriate winter hiking clothing, and take careful precautions when making travel plans.
When it is cold outside, staying dry is your main concern. Hypothermia can result from both cold and wet weather. Even in mild cases, the combination of dampness and coldness is unbearable. By using these helpful winter hiking tips, which include how to stay warm and what gear is needed for winter hiking, you can avoid it.
Factors to Consider
Weather Conditions
- Expect significant swings in temperature throughout the day, especially at higher altitudes.
- Pack for the coldest anticipated temperature, not just the average.
- Consider the type and amount of potential precipitation (snow, rain, sleet).
- Choose waterproof breathable layers and outerwear suitable for the wetness.
- Wind chill can dramatically decrease your body temperature. Pack windproof layers and a sturdy shelter that can withstand gusts.
- Steeper and icy slopes might require crampons or traction devices. Snow depth affects boots and gaiter choices.
- Day hikes require less gear than multi-day trips. Consider food, water, and sleep systems for overnight outings.
Packing Tips
Organize your gear. Separate layers, food, and emergency supplies into easily accessible compartments.
Use waterproof compression sacks. Protect electronics and clothing from potential moisture.
Pack layers easily. Choose clothing that can be layered or shed quickly to adjust to changing temperatures.
Distribute weight evenly. Balance your backpack’s weight to avoid fatigue and discomfort.
Winter Hiking Skills
Learn about layering. Understand how to layer properly for optimal warmth and moisture management.
Practice winter navigation. Master map and compass skills and learn to use a GPS device if applicable.
Know avalanche safety. If venturing into avalanche terrain, take an avalanche safety course and carry appropriate equipment.
Plan for emergencies. Understand snow-specific first aid techniques and emergency signaling methods.
Winter Hiking Essentials
- Insulated Waterproof Boots:Boots that are waterproof and insulated will keep your feet dry and warm. Look for those with good traction in slippery conditions.
- Insulating Socks:Wear moisture-wicking and insulating socks to prevent frostbite and keep your feet comfortable.
- Insulating Layers:Wear multiple layers to retain heat. An insulating layer is added after the moisture-wicking base layer, and a waterproof outer layer is the last layer.
- Waterproof Outer Layer:A waterproof jacket and pants protect you from rain and snow, keeping you dry and warm.
- Gloves or Mittens:Insulated, waterproof gloves or mittens are essential to protect your hands from cold and wet conditions.
- Hat:A thermal hat retains heat and shields your head and ears from the cold wind.
- Gaiters:Gaiters cover your boots and lower legs, preventing snow from entering and keeping your legs dry.
- Snowshoes or Crampons:Use snowshoes for deep snow and crampons for icy conditions to improve traction.
- Trekking Poles:Provide stability, distribute weight, and offer support on slippery surfaces.
- Winter Backpack:Carry a backpack with enough space for extra layers, food, water, and emergency supplies.
- Navigation Tools:Bring a map, compass, and/or GPS device to navigate through winter landscapes where landmarks may be obscured by snow.
- Emergency Shelter:Pack a lightweight emergency shelter in case you need to stay overnight unexpectedly.
- Headlamp:Daylight is shorter in winter, so a reliable headlamp with extra batteries is crucial.
- First Aid Kit:Include winter-specific items like hand warmers, blister treatment, and medications.
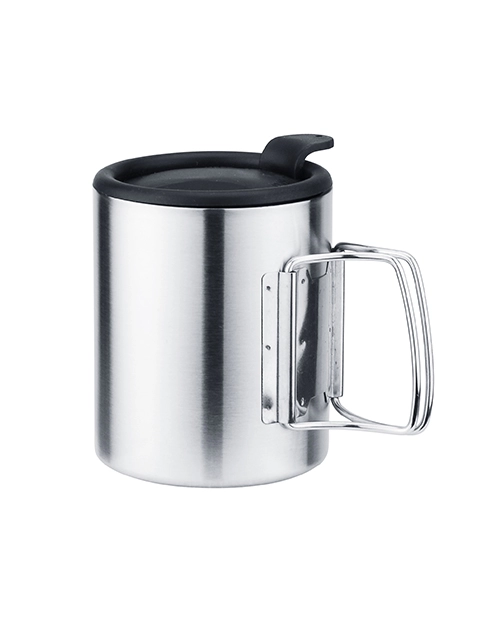
- Nutrition and Hydration:Carry energy-rich snacks and a thermos with hot drinks to stay well-nourished and hydrated.
- Sun Protection:Even in winter, protect yourself from the sun with sunscreen, sunglasses, and lip balm with SPF.
- Winter Traction Aids:Microspikes or similar traction devices enhance grip on icy surfaces.
- Weather-appropriate Clothing:Check the weather forecast and dress accordingly. Be prepared for changing conditions.
- Communication Device:A fully charged mobile phone or a two-way radio should be carried for communication in case of emergencies.
- Emergency Whistle:A whistle can be a useful signaling device if you need assistance.
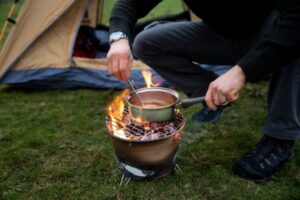
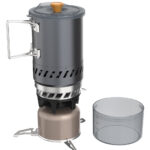
- Best Stove for Winter Camping:For winter hiking, the best options are generally liquid-fuel stoves, perform well in cold temperatures and at high altitudes compared to canister stoves and have readily available fuel sources.
Some canister stoves have features like inverted gas canisters or integrated heat exchangers that improve fuel flow and their performance in cold temperatures. These often have features like a wider burner for larger pots and windshields to protect the flame from the elements.
For more details, click here
Popular winter hiking routes
Everest Base Camp (EBC)
Nepal has always been known as the “Mountain Kingdom” and “Hiker’s Paradise” by outdoor enthusiasts. Nepal has 8 of the world’s 14 8,000-meter snow-capped mountains, thus forming the world’s top snow-capped mountain landscape avenue.
Duration: 11~16 days
Suitable season: March-May & September-December
Altitude: 2610m~5550m Observation Deck~5364m Base Camp (need to adapt to the altitude)
Difficulty: 4~5⭐ (full five stars)
EBC is one of the top ten classic hiking routes in the world. You can see the Himalayas up close. At the same time, there are several 6000-meter snow-capped mountains to climb on this route, there is the beautiful Gokyo Lake, and there are 3 dense passes to challenge. Of course, you can also just go to the Everest Base Camp, so the route is also very flexible;
You can enjoy 4 8000-meter peaks: Everest, Lhotse, Makalu and Cho Oyu; and – Khumbu Glacier.
There are countless snow-capped mountains above 5500 meters. You can get close to these snow-capped mountains and glaciers, or even zero-distance contact. It is a paradise for snow mountain lovers and photography enthusiasts.
| Item | Everest Base Camp (EBC) |
| Location | Nepal, Southern Himalayas |
| Altitude Range | 2840m – 5600m |
| Trekking Days | Approximately 10-14 days (+ extended route) |
| Total Distance | Approximately 170km (+ extended route) |
| Total Ascent | Approximately 10000m (+ extended route) |
| Difficulty | High, requires strong physical fitness and experience |
| Major Highlights | Mount Everest (8848m), Lhotse (8516m) |
| Best Season | Mid-October to early December (Winter) |
| Accommodation | Mountain lodges, conditions can be more basic |
| Special Challenges | High-altitude trekking, potential for altitude sickness |
| Trail Conditions | Established but some sections can be challenging, such as passes and glaciers |
| Risks | Higher, including altitude sickness, weather, and trail conditions |
| Recommendations | Comprehensive physical preparation, specialized gear, altitude sickness prevention and treatment |
What should you do before packing your equipment when setting off for the EBC trek in Nepal❓
1. Understand the weather, temperature, and road conditions for the trek, including the temperature difference between morning and evening, the temperature range, whether it rains, whether it snows, and whether there are snowy roads to climb, and then prepare clothing, equipment, sleeping bags, etc. according to the climate of the actual date of travel;
2. Determine the itinerary of the trekking route, and prepare food, cash, and return trip plans according to the number of days of trekking;
3. Understand the backup plan for the trek. If you feel uncomfortable due to altitude sickness, are there any medical points along the way, how to descend, and what should you pay attention to on the route? For example, can you take a shower, is there a particularly difficult route, and how to solve it if you accidentally get injured and can’t walk?
4. Understand the full cost in advance;
⚠️ Pay attention to the trekking equipment and don’t miss:
- Raincoat
- Waterproof cover for schoolbags
- Sports camera memory card. Be sure to record the scenery along the way during the trek. In order to avoid insufficient memory, it is recommended to carry a spare memory card;
- Water source filter or water bag. If the water source is insufficient, be sure to buy enough water on the road in advance!
- Prepare enough cash to avoid cash shortage
- Food (you should bring more sausages, instant soup bags, soy milk powder)
⚠️Tips for hiking
- Do not drink water on the mountain, as it may contain parasites
- You must bring a jacket and a cold hat every day during the whole hike to avoid altitude sickness
- Do not take a shower or wash your hair on the mountain
- The route is somewhat difficult, and it is not recommended to fight alone
Mount Fuji, Japan
Mount Fuji is located in the central part of Honshu Island, Japan, with an altitude of 3,776 meters. It is the highest mountain in Japan. However, the starting point of each mountaineering entrance is basically above 2,000 meters, so the difficulty is not very great. There are 4 mountaineering routes, namely Yoshidaguchi, Subashiguchi, Gotembaguchi and Fujinomiyaguchi.
There are mountain huts along each road, which are open to the public during the mountaineering season. Each road is divided into an uphill road and a downhill road. Among them, Yoshidaguchi and Subashiguchi are the same above the eighth station, so when you go down the mountain from Yoshidaguchi, you must pay attention to the road signs at the eighth station.
🗺️Recommended mountaineering routes:
🌟Fujinomiya route-newbie friendly, about 8 hours. It is the shortest route of the four routes. The fifth station is closest to the top of the mountain, but there are many rocks and the slope is steep, which requires certain physical strength. The same route is used for the entire round trip, which is suitable for climbers with certain mountaineering experience and who pursue efficiency. The fifth station is 2,400 meters high.
Climbing strategy:
Going up the mountain: It is estimated to take 5 hours. Although there are not many rest points along the way, the distance is short and you can reach the top of the mountain quickly.
Going down the mountain: It is estimated to take 3 hours. Pay attention to safety when going downhill to avoid slipping.
Suggestion: Because the route is steep, you need to pay special attention to the reaction of the mountains, take a break in time, and replenish your energy
🌟Muzo route-the choice of experienced people, about 10 hours. Located on the east side of Mount Fuji, it is famous for its rich vegetation and unique downhill sand sliding road. The starting point is at a low altitude, suitable for climbers who have a certain mountaineering foundation and like to explore different scenery. There is a large forest between the fifth and sixth stations, and the fifth station is 2,000 meters high.
Climbing strategy:
Going up the mountain: It is estimated to take 6 hours. There is lush greenery along the way, and you can enjoy the beauty of alpine plants.
Going down the mountain: It is estimated to take 4 hours. Below the seventh station is a sand sliding road, which is a unique experience, but you need to pay attention to control the speed to ensure safety.
Suggestion: There are relatively few tourists on this route, and there are also few mountain huts. You need to prepare in advance and bring enough supplies.
🌟Gotemba Route—Expert Challenge, about 12 hours. It is the longest and most difficult of the four routes, with a total distance and altitude difference far exceeding other routes. It is suitable for climbers with rich mountaineering experience and seeking challenges. The fifth station is the farthest from the top of the mountain. When going down the mountain, you can run along the large gravel slope and observe Mount Hoei from the side. The fifth station is 1,440 meters high.
Climbing strategy
Going up the mountain: It is expected to take 8 hours. The starting point is at a low altitude and it takes a long time to climb.
Going down the mountain: It is expected to take 4 hours. You also need to pay attention to safety to avoid injuries when going downhill.
Suggestion: Due to the long journey, it is recommended to stay overnight in a mountain hut on the way to adapt to the high altitude environment and reduce physical exertion.
🌟Yoshida Route—Newbie-friendly, about 10 hours. The starting point is at the 5th station of the Fuji Subaru Line. There are many mountain huts and two first aid stations along the way, which is safe and guaranteed. The road is wide and the scenery along the way is beautiful. It is the best choice to experience the fun of climbing Mount Fuji. Therefore, there are the most climbers, the most roadside mountain huts and commercial facilities, and the 5th station is 2305 meters high.
Climbing strategy:
Ascending the mountain: It is expected to take 6 hours. There are many rest points and supply stations along the way. You can rest in time according to your physical condition.
Descending the mountain: It is expected to take 4 hours. The route down the mountain is different from the route up the mountain, but it is also clear and easy.
Suggestion: Due to the popularity of this route, it is recommended to avoid weekends and holidays to avoid being too crowded. In order to watch the sunrise, it is recommended to stay in a mountain hut one night in advance and set off in the early morning.
🎒 Supplies and equipment:
👟 Hiking shoes: Be sure to choose mid-high top styles.
🧦 Anti-sand foot covers: Essential when going down the mountain, protect your feet.
💧 Water bag: Simple and practical, more convenient than mineral water.
💪 Muscle patch: Lightweight but needs to be applied once, or consider using knee pads.
👕 Quick-drying clothes: It is recommended to choose long-sleeved ones, which are warm and fashionable.
🧣 Wool socks: Prevent hiking shoes from rubbing your feet and improve comfort.
💡 Headlamp: You can borrow others on the Yoshida Line, but it is recommended to buy a headlamp with slightly higher power.
😷 Mask: A must-have for dust prevention when going down the mountain.
🌳 Trekking poles: It is recommended to carry two to provide better support.
🎩 Knitted hat: The wind is strong on the top of the mountain, protect your head from the cold.
FAQ:
What is the best temperature for winter hiking?
Generally speaking, temperatures between 15°F to 35°F (-9°C to 1.7°C) are considered ideal for winter hiking. This range allows for comfortable activity without being too cold or too warm. However, it’s important to dress in layers and be prepared for fluctuating temperatures throughout the day.
How do I pack for a winter hike?
Clothing
- Base layer: A moisture-wicking, thermal base layer is essential to stay warm and dry.
- Mid layer: A fleece or down jacket provides insulation.
- Outer layer: A waterproof, breathable jacket and pants that protect against snow and rain.
- Hats and gloves: A warm, waterproof hat and gloves are essential to keep your extremities warm.
- Socks: Wool or synthetic socks help keep your feet warm and dry.
Footwear
- Waterproof hiking boots: Sturdy, waterproof boots with good ankle support are essential for winter hiking.
- Gaiters/knee pads: Gaiters can help keep snow and debris from getting into your boots.
Other essential gear
- Backpack: A waterproof backpack that can easily carry all of your essentials.
- Headlamp: A headlamp is essential in low-light conditions.
- Navigation equipment: A map, compass, or GPS device is essential to stay on track.
- First aid kit: A first aid kit is a must-have for any outdoor activity.
- Sunscreen: Even in winter, the sun is strong, especially at high altitudes.
- Sunglasses: Sunglasses can help protect your eyes from the glare of the snow.
- Food and water: Bring plenty of high-energy food and water, as you will burn more calories in cold weather.
- Emergency supplies: Bring a whistle, emergency blanket, and matches in case of emergency.
How can I stay warm while hiking in winter?
- Clothing: Choose moisture-wicking fabrics and dress in layers, such as merino wool or synthetics as a base layer, down or synthetic insulated jackets as a mid-layer for warmth, and a hardshell outer layer for weather protection.
- Protect your extremities: Wear gloves, hats, and scarves to keep your hands, head, and neck warm.
- Pace yourself: Avoid overexerting yourself, as this will cause you to sweat and get colder.
- Eat regularly: Fuel your body with energy-dense foods and stay hydrated.
What are the risks of winter hiking?
- Frostbite: Frostbite occurs when the skin and underlying tissue freezes, and can even lead to amputation in severe cases.
- Avalanches: In areas with snow, there is a risk of avalanches, which can be fatal.
- Getting lost or disoriented: In winter, especially in the whiteout, it is easy to get lost or disoriented.
- Slips and falls: Slippery conditions increase the risk of falls, which can lead to injuries.
How do I choose the right winter hiking boots?
Choosing the right winter hiking boots is essential to staying warm, comfortable, and safe on your winter adventures. Some factors to consider when choosing:
Good insulation Waterproof Ankle support Provides good traction If you are hiking on steep slopes or icy conditions, you will need a boot with more grip.
What is the difference between snowshoes and crampons?
| Feature | Snowshoes | Crampons |
| Purpose | Prevent sinking in deep snow | Provide traction on ice and hard-packed snow |
| Terrain | Soft, powdery snow | Ice, hard-packed snow, steep slopes |
| Attachment | Straps to your boots | Attach to the sole of your boots |
| Use | Best used in areas with deep, soft snow | Essential for climbing steep, icy slopes |
How do I avoid getting lost while winter hiking?
Before you go:
Study your route, learn basic navigation skills, check weather conditions, pack the essential gear, take a map, compass, GPS device, and headlamp. Carry a whistle with you to signal for help if you get lost.
While hiking:
Avoid straying from the trail, as it is easy to get lost; mark your route, use rock piles or other markers to mark your path; be aware of your surroundings, and notice landmarks and natural features. If you are unsure of your location or feel lost, do not hesitate to turn back.
How to Stay Warm Hiking in Winter?
- Layer correctly:Wear multiple layers so that each layer can trap heat. You can also take a layer off if you start to get too warm.
- Wear thick socks:Thick socks provide some insulation and are recommended for cold weather. Cotton socks are not recommended because they absorb too much moisture and can cause blisters.
- Wear gloves:Gloves can keep your hands warm and dry and can protect your hands if you’re using trekking poles or are on a trail that requires a lot of hand holds.
- Wear a hat:Wearing a warm, well-made hat is essential for winter hiking. To be ready for anything Mother Nature may throw at you, think about investing in something waterproof.
- Wear gaiters:Gaiters not only keep your lower legs dry but also add an additional layer of warmth and wind protection. Ankle-high gaiters are useful for very small amounts of snow, while knee-highs are a wiser buy.
- Wear an insulating layer:One of the most crucial layers of winter hiking clothing is an insulating layer because it helps you maintain body heat. Usually, fleece, synthetic down, or down are used to make this layer.
- Wear snow pants:Snow pants are good to keep your legs warm.
- Wear a winter hiking coat:A coat can keep you warm when hiking in colder temperatures.
Other tips for staying warm while hiking in cold weather include
- Keeping your head and extremities warm
- Drinking warm beverages
- Packing the right food
- Getting an emergency blanket
- Making a fire
- Investing in a good quality sleeping
Recommended popular articles
Best Titanium Cookware, 2024
The Best Liquid Fuel Backpacking Stoves
Packing Light: Our Guide to Minimalist Camping
ODM service
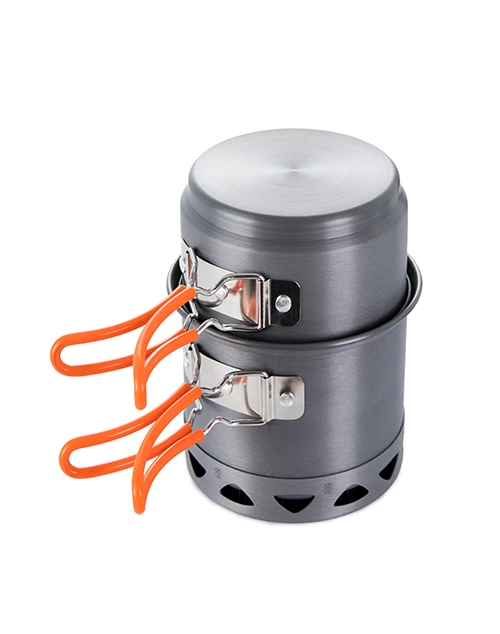
Looking for reliable wholesale outdoor equipment? At Deermaple, we specialize in ODM service, offering high-quality and innovative cooking gear tailored to your needs.
If you are interested in outdoor gear wholesale, please contact us.

